
Have you been wondering how to use the Foil Quill from We R Memory Keepers? I have wanted one for ages and finally managed to find it on sale and actually have the money for it. Whoohoo, great excitement.
I really wanted to purchase the pack with the three sizes in it. The WRMK comes in Bold, Standard and Fine. I ended up just purchasing the Fine tip one as they were sold out of the others. I think my preference would have been to purchase the Standard tip for more general work.
Having said that, I was super impressed with how it worked! Let’s look at what it is, and how to use the foil quill.
This post contains some affiliate links for your convenience (which means if you make a purchase after clicking a link I may earn a small commission but it won’t cost you a penny more)! Read my full disclosure policy.
What is the foil quill?
The foil quill is a small, heating, pen-like device that you can place into your cutting machine, the same as you would a drawing tool, and tell your machine to draw. The foil quill with ‘melt’ foil onto your cardstock or material of choice in the design that you have chosen.
Super cool huh!
Let us look at what is in the pack

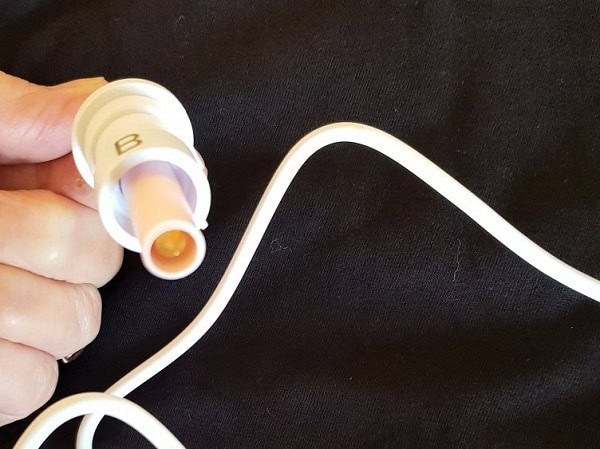
These are the adapters that come in the pack so that you can use the Foil Quill in a number of cutting machines. I have a Scan N Cut so the, what feels like ceramic, insert has been screwed into the B adapter.
Included is:
-The instruction booklet in a number of languages. Instructions are fairly basic.
-Four adapters. A is for the Silhouette, B is for the Scan N Cut, C is for the Cricut and the D is for a Sizzix.
– A Ceramic tool with a shortish cord that has a USB connection on the end to plug into the power.
– Metal heat protector that you place under the tool while it is heating up to protect your mat and cardstock/materials. It is removed before your machine starts the design.
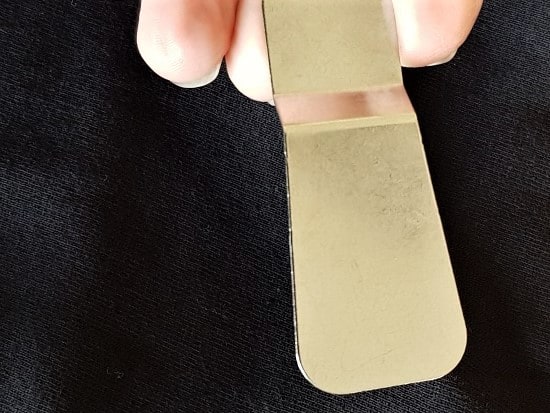
Above is the metal heat protector. It looks large in the photo however it is not all that big. You need to remember to remove it before your machine starts. It is only to be used while in standby mode so that your mat and whatever is on the mat is protected from the heat that the Foil Quill produces.
More about the tool
The tool itself is interesting. It has a heat tip, protected by the ceramic outer shell. The heat tip is what activates the foil and adheres the foil to your project.
What else do you need
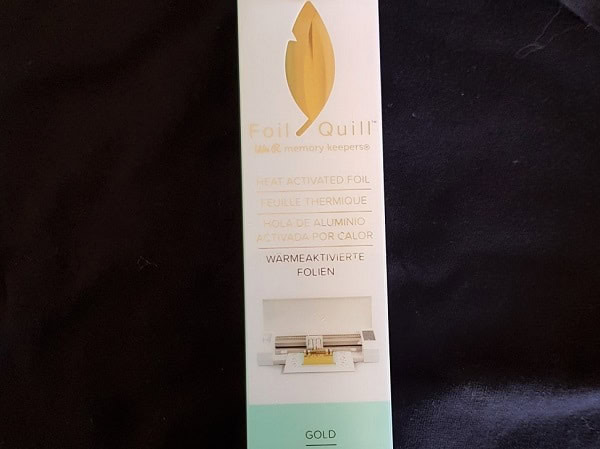
Well, you need foil. Technically it is classified as ‘heat activated foil’ if you are looking for it in another brand. It comes in some GREAT colors and for this project, I purchased the gold WRMK brand foil. I have previously purchased a different brand that will work with the Foil Quill too.
You can also purchase their branded tape to hold the foil down. The foil itself is really lightweight and will not stick on its own to your project. I used ordinary masking tape which worked a treat.
Heating the Foil Quill
While the instructions state to use the USB on your machine, I recommend that you use an external source of power and NOT plug it into your cutting machine.
You can purchase a USB adapter that fits into your power socket and allows you to plug any USB connector into it. You are able to charge your phone or in this case, plug your Foil Quill in to heat it up.
Heating time is around 5 minutes.
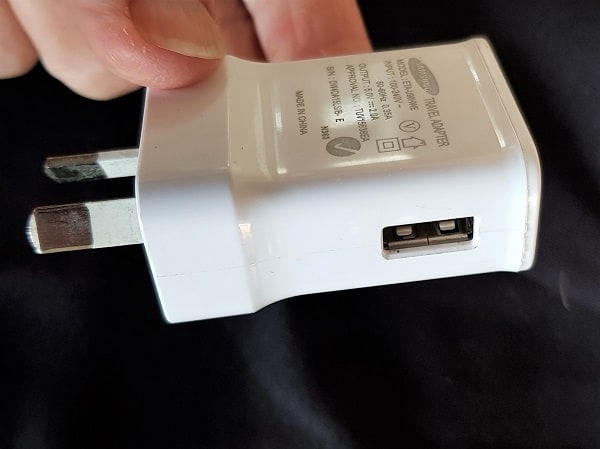
The cord that is attached to the tool is not overly long and an extension cord may be required to reach your power outlet.
NOTE: This is an Australian USB power adapter, you will need to purchase one that suits your country’s power outlets.
What next…
Ok, so we have the heating sorted. Let’s look at some steps to reach the end goal of foiling your design.
- Remove the tool from the packaging and screw it into the correct adapter for your cutting machine.
- Plug it into the power.
- Place your cardstock/material onto your mat and load it into your machine. Set up the project so that you are ready to draw. If you have a Scan N Cut, I recommend doing any scanning prior to heating your Foil Quill. (Look below for more info on this)
- Place the Foil Quill into the slot that you would load your PEN tool into. For a Scan N Cut, there is only once choice. If you have a Cricut select the pen slot.
- Place the metal heat protector piece under the Foil Quill tool and then turn the power. Allow to heat for about 5 minutes.
- Remove the metal heat protector and set your cutting machine going.
Tips for setting up your project
As I mentioned earlier, the foil is very lightweight and you need to tape it to your project before you send it through your machine. It needs to be fairly taut so that it doesn’t move too much as the tool heats the areas of the design.
If you have a Scan N Cut, scan your mat once you have everything set up and ready to be foiled and check that you have your design over the foil. If you need to shift the foil (or design) remember to remove the heat protector if you need to scan again. (I forgot and it was not a nice outcome).
BEFORE you remove your mat after the design has been completed, remove the foil and double-check that all of your design has been foiled. If any has been missed then re-place the foil on your project and send it through the cycle again. This should catch any missed bits.
If you flip the foil around so that the second pass is using an unused section of foil it may produce better coverage.
NOTE: Once you remove your mat the above will not work as the mat will not load in exactly the same place to achieve a nice outcome. (well, maybe if you have a miracle it might 🙂 )
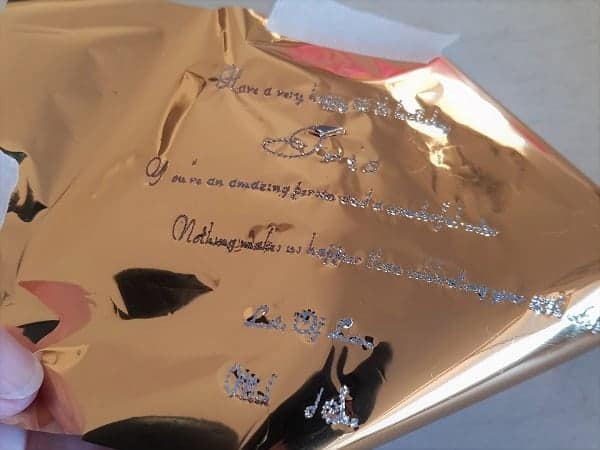
This is what your foil will look like after you have transferred your design. My project was writing… I purchased a single line font specifically for use with the Foil Quill.
NOTE: You can see the masking tape that I used to hold the foil down onto the project. I recommend that you use more than I did in this picture to hold the foil down a little better.
Check that the masking tape will not affect what you are making when it is removed. I had no trouble at all with cardstock.
Finished project
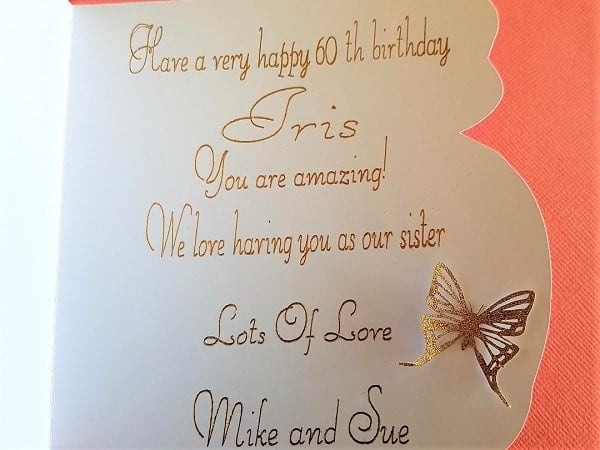
This is the inside of the card I made using the Foil Quill and gold foil. I was really pleased with how the foiling turned out. It was created with the Fine tip Foil Quill and was run through the Scan N Cut twice as it missed a couple of letters in the first pass.
The only section that it didn’t align quite right was the H in the first word. I think it still looks nice and only you and I know that there is a small error. Remember to check your design has transferred correctly before you remove the mat, you cannot do the second pass once the mat has been unloaded.
Hopefully you have found the information in “How to use the Foil Quill” easy to follow and it has inspired you further with your designs and projects.
I look forward to sharing more designs, tips, and step by steps with you soon.
Happy creating,

Join me
Join me in the Scan N Cut – Let’s Create With Sue facebook group.
I would love to see you there.
While you are here, don’t forget to check out my other posts. There are heaps of helpful information in them.
Like it! Pin it!
This post was – # how to use the Foil Quill


Hi I’m extremely new to foil quill, just wondering where I can purchase single line fonts for quill as I have bought a cpl but still are not single line.
Thank u.
Lyn
Hi Lyn, I purchased from Single Line Fonts. The one I used needs to be accessed through SCAL or similar which is a little bit of a nuisance. They seem to have just released some in TTF format from about $7.
https://www.singlelinefonts.com/collections/single-line-fonts
Hi Sue,
I would love to have some hands on classes with scan n cut. I live in Burleigh Heads Gold Coast Queensland. Am willing to pay for lessons. I’m struggling through my self but it would be more fun in a group. Talk soon Chris.
Do folks prefer this over the foiling kit, i.e with the glue pen? Not sure if one is better than the other in terms of quality…?
I have both. I have been very impressed with the Brother Foiling Kit too and it comes with some designs that turn out really nice. There are definitely advantages with the Brother Kit. The foil is very economical for the Foil Quill and it does do a nice job as well.
Love the foil quill I’m convinced now I’ll have to have one, after I finish your course I have been playing away for a couple of years just doing basics but I wanna get better and use my machines more
First attempt coming up today on htv vinyl. Lol
Hi Jo, there are so many things that you can do with your Scan N Cut. So much fun!. I also have the Brother Foil kit and that works really well too. Worth looking at that as an option. I have a post on that too and you can find it at https://www.createwithsue.com/rose-card-brother-foil-kit/. Foiling is great fun.:-)